Showing posts with label scrapbooking basics. Show all posts

Saturday, March 19, 2022

Start a Scrapbook Tutorial for Beginners - Guide to Creating a First Scrapbooking Page

Do you want to create a scrapbook but not sure where to begin? In this Scrapbooking Tutorial for Beginners ways to get started scrapbooking are discussed and the steps to take to make your first page. If you have never scrapbooked before here are some scrapbooking tips that will get you creating scrapbooking layouts in no time.

Start a Scrapbook Tutorial for Beginners - Guide to Creating a First Scrapbooking Page

Scrapbooking is a fun and engrossing hobby but it can also be a bit overwhelming at first. That's why I've written this simple guide to walk you through the process of creating your first scrapbooking page. Let's get started.

The key to good scrapbooking is organization. Remember the more organised you are the better the flow. This is particularly important if you have time constraints. There is nothing more annoying than sitting down to scrap only to find that you have forgotten an essential item. If you are a person who likes lists you might find it helpful to make one to manage your project but this is a matter of individual style and ways of working.

1. Organize Your Photos and Select Your Favorites

Gather together the photos you would like to display in a scrapbook layout page. You probably have more than you need. That's OK because you can narrow down your selection later. For now just select 3-6 photos that you would like to include in your photo scrapbook.

Choose the best images. Try to avoid including photos that are blurry, out-of-focus, faded or heavily creased. However do not let the quality of the photo dictate whether you scrapbook it or not as the most important thing is creating a lasting memory of an experience that is important to you.
To Create Your First Scrapbooking Page - Step 1 - Organize Your Photos and Select Your Best Images to Scrapbook

Remember if you have too many photos left over you can eventually include them in another album or give them away to family or friends. If you are storing a lot of photographs in an old shoe box or something similar consider buying an archival box that will preserve your photos. These are excellent and they provide peace of mind knowing that your photos are not being degraded by the medium they are stored in.

Until you are confident it may be best to start with photos that can easily be replaced in case you make a mistake that you can't readily rectify. Adopting this strategy will give you the confidence to just have a play around without fear of getting it wrong which is an important creative principle.

2. Decide on the Size of the Layout

One of the earliest decisions that needs to be made when starting a scrapbook is what size to make your layout. Traditional physical scrapbooking pages are 12x12 inches (30.5xx30.5 cms) or 8.5x11 inches (21.5x27 cms) but there are other options as well like 8x8 inches.

One of the advantages of going with 12x12 is that you can add a lot of photos and gain confidence using a larger layout. However if you don't have a lot of photos then you may decide to settle on a smaller format for your layout. Remember that the size of your chosen format will govern future choices like your paper sizes and albums.

3. Journaling

One of the reasons why so many of us love scrapbooking is the mix of storytelling, craft and photography. Each of these three are pillars to a good scrapbooking layout. Even though journaling is a key element it can be as long or short as you like but it needs to add value to your photographs by giving context to the photographs displayed and providing additional information.
Start a Scrapbook Tutorial for Beginners - Guide to Creating a First Scrapbooking Page - Journaling is a key element. Think about what you want to say. Make notes you can refer to later

When creating a page it is important to consider your journaling carefully. Are there facts you need to check up on? If so do this before you start your page.

What would you like to say about these photos? Do you want to tell a story? or simply give the basic facts?

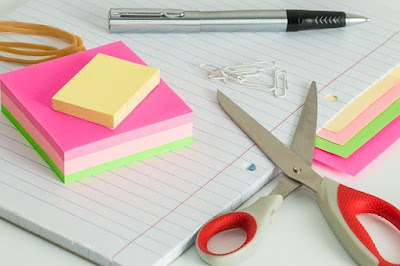
What feeling do you want to convey? Write down your ideas. Make notes to jog your memory. Post-it notes come in handy to record small snippets of information you want to include in your scrapbook layout and can easily be removed once you have added your actual journaling.
Start a Scrapbook Tutorial for Beginners - Journaling your First Scrapbooking Page make notes of what you want to say. Post it Notes are good for recording small snippets of information and can later be removed

The aim of good journaling is to say enough about what is occurring to inform but not overshadow the photos or bombard anyone looking at the page with too many facts. Aim to be succinct.

Telling a story is a very effective journaling technique. Make your page personal to you. Your family and friends will want to know the story behind the photos. Journaling is best when its kept simple but make sure you cover the basics: like where, when, what, who, how, why.

Follow these links for more in-depth articles about how to use scrapbook journaling and quotes to use in scrapbooking layouts

Further Tips for Journaling

  • Describe what is happening in the photos.

  • Include the dates the photos were taken or the events occurred.

  • Name the people/places in the photos.

  • Tell the story in you own hand. Handwriting makes your journaling more personal. Later on you can try out computer journaling but for now stick with pen and ink.


4. Buying Your Scrapbooking Supplies

Scrapbooking supply stores can be a bit daunting at first but contrary to popular belief you don't need to spend a whole lot to get started. Think about what you need before visiting the store so that you stay within your budget and don't buy items that aren't really necessary. If you have a theme in mind such as a wedding or holiday that this page will form part of you might consider buying extra supplies to ensure consistency.

One useful way to create a scrapbook for the beginner is to buy a scrapbooking kit which will contain all your need to make your first scrapbooking page. Typically scrapbooking kits come with coordinating papers, embellishments, stickers and a range of other accents like die-cuts and brads.

Scrapbooking kits are usually good value for money and offer a no fuss way to create your first page without the worry of coordinating all your scrapbooking layout elements.

If you want to have complete artistic control over the scrapbooking supplies you buy for your first page then here is a list of the bare minimum of scrapbooking items you will need to start your scrapbook. You will need:

  • Scrapbook Album
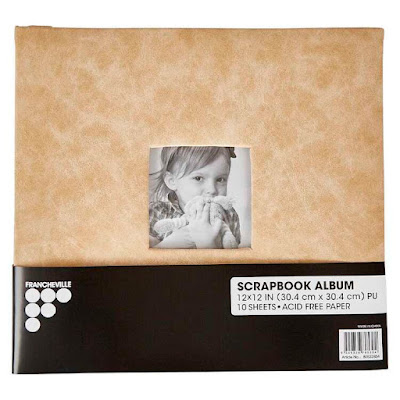
    Suggested formats are 12x12 or 8.5 x 11. Make sure the album is archival safe and acid free. Cheaper albums could damage your photos by leaching chemicals into the photos and paper with the passing of time if they are not designed for longevity.

    Strictly speaking an album is not 100% necessary to buy straight away but if you don't purchase one at the beginning you will need a method such as a page protector for keeping your finished page safe otherwise it is at risk of spills and creasing. Another advantage of buying an album is that each page will come preloaded with white sheets of cardstock.
    to start a scrapbook you will need a scrapbook album typically 12x12 inches to display and store your finished scrapbooking layouts

  • Scrapbooking Adhesive
    Adhesive on a runner, double-sided tape or a glue stick. Again ensure that the adhesive is made for crafting and is acid and lignin free.


  • Cardstock
    Buy cardstock individually or in a small pack if you are not investing in a scrapbooking kit.
    Consider cardstock which is thick sturdy paper as the background of the page layout on which you attach all the elements: photos, journaling, embellishments. It is often a good idea to go for a neutral color for cardstock and then add contrast with scrapbooking papers. If you want the cardstock to coordinate with specific photos then by all means choose a matching or coordinating color.


  • Scrapbook Paper
    Printed papers to use in scrapbooking layouts come in all manner of designs such as florals, animal prints, hearts, checks and stripes. Papers can be bought in individual sheets or as a bank. If you decide against the kit you will need to pick out a sheet or two of paper that coordinate with your photos and with the cardstock.
    Ensure that any scrapbook paper and cardstock you use coordinates with your photos and is made for scrapbooking

  • Fine-tip Pen of Archival Quality
    Pens for scrapbooking are made from pigment ink and are permanent. You will need a good-quality black pen that is of archival quality, waterproof, fade resistant, non-bleeding and acid free. There are lots of different kinds of markers to choose from including calligraphy and brush pens.


  • Paper Trimmer
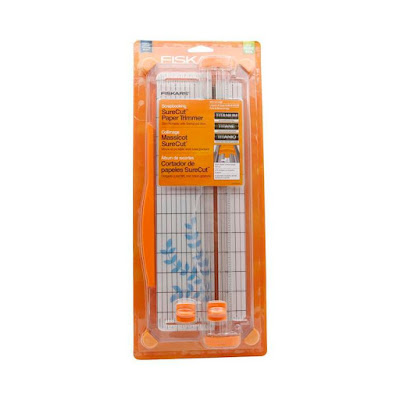
    A paper trimmer is an invaluable scrapbooking item. While not strictly essential to make your first scrapbooking page bear in mind that it is hard to cut papers accurately with just a pair of scissors. If you do decide to invest in a paper trimmer it will need to be sized 12 inch (30.5 cms) to cope with 12x12 papers.
    To start scrapbooking your first page you will need a good quality 12 inch paper trimmer such as the Fiskars Sure Cut

  • Embellishments
    Embellishments such as die cuts, brads, buttons, ribbons, washi tape, borders and other materials are another way to add style and personality to your scrapbooking layout page. Make sure that you pick embellishments that suit your photos and your own personal style. All sorts of themes are readily available eg travel, nautical, vacation, camping, weddings, babies or you can simply pick up a pack of more neutral embellishments that could be applied to a variety of layouts.
    Buy a few well chosen embellishments for your scrapbooking layout to provide accent and interest to your photos and journaling

    I personally find washi tape very useful for accenting photos and papers and would recommend that you consider buying at least one roll that you think will work well with your layout.


  • Scrapbook Stickers (Optional)
    Stickers are useful for titling and to add enhancements to your page. Make sure these are acid free and lignun free and are made for scrapbooking purposes. Ordinary stickers are not designed for the long haul and will eventually leach glue into your precious page.

    Stickers can be expensive as it is easy to get carried away and buy more than you need. For economy I suggest you buy a small booklet of stickers with designs that appeal to you, are on your chosen theme and which you think will accent your photos.
    Stickers can be useful embellishments for enhancing scrapbooking layouts for example these heart-shaped stickers. Buy a small packet of stickers to start a scrapbook

    The range of choice for scrapbook stickers is enormous and prices are generally reasonable depending on where you shop. There are stickers on all sorts of themes and niches eg for travel scrapbooks, wedding scrapbook, vacation scrapbook, baby scrapbook etc


  • Other Scrapbooking Supplies

    Other very useful items to create a scrapbook page are:
    • Ruler
    • Pencil
    • Eraser
    • Scissors (sturdy)

As you can see there are a number of basic scrapbooking supplies needed to get started which is why a scrapbooking kit can be both cost effective and a way to take any headache out of shopping for your scrapbooking supplies especially if you are struggling to coordinate items. There is a whole science around color schemes so if this is not your forte a scrapbooking kit may be the way to go.

When I started out scrapbooking I bought a scrapbooking kit which included the album and page protectors as well as a selection of coordinating papers and embellishments. Looking back I believe it was a good decision to buy the kit even though I didn't use a lot of what was included all at once.

What I liked was the opportunity of playing around with lots of different elements to see what looked good on the layout. I learned very quickly what I liked and didn't like which was definitely helpful in developing my own personal scrapbooking style.

5. Designing Your Scrapbook Layout Page

Beginner scrapbookers usually find it helpful to take a look at pages created by others before launching into their own layouts. There are a variety of scrapbooking magazines on the market many of which include quite detailed descriptions of the resources used to create the page. Apart from the internet your local library is a good place to start if you are in need of inspiration as there is a good chance they will have at least one or two scrapbooking magazines on subscription.

Layout is one of the most important aspects of scrapbooking. Before adhering any pictures to the page try out different positions until you are happy with the arrrangement. Ensure you leave enough room for your journaling and any embellishments you want to include.

If you are struggling with the layout there are some good resources on the net. Try our web resources section for links to sites providing layouts and sketches suitable for most types of project. Remember that to start with anyway a simple layout is best.
When starting a Scrapbook choose a simple layout and let the photo speak for itself. Use minimal embellishments to tie it together. Here is an example of a simple monochromatic scrapbook layout.

Layouts recommended in scrapbooking books and magazines are only a guide to get you started as a beginner. Remember you have the freedom to change the design to suit your own particular needs. If you want to add extra journaling or substitute a larger image for a smaller photo go right ahead. The last thing you want is your creative process being hampered or slowed down by is anything too prescriptive.

6. Assembling Your Scrapbook Layout Page

After you have decided on a layout that you are happy with assemble the page elements. You may need to do this in a particular order depending on the desired effect. Take your time putting it all together to ensure accuracy. Measure distances and ensure that all elements on the page are properly aligned before sticking them down.

Finally pop your page into a plastic sleeve from your album to protect it from accidental soiling and damage. Then there is the magic of sharing your creation with your friends and family. Don't be shy about sharing who knows you might inspire other around you to also start scrapbooking.


This article describes tips for the beginner on how to start a scrapbook and create a first page. Key considerations are explored to help you avoid newbie mistakes like buying too many expensive scrapbooking supplies that you most likely won't need. Also discussed are some journaling tips to help you tell the story behind the photos and to create first scrapbooking page with love to enjoy and be proud of.

Related Articles

10 Ways to Add More Handwritten Journaling to Scrapbook Layouts
6 Key Elements of Scrapbooking Layouts
6 Essential Scrapbook Tools for the Beginner Scrapbooking Physical Layouts
Essential Scrapbooking Supplies for Scrapbooking Physical Layouts
Beginners Guide to Scrapbooking Childhood Memories in a Memory Album
Simple Photo Matting for Beginner Scrapbook Layouts

Wednesday, March 31, 2010

Free Scrapbooking eBooks to Download

eBooks about scrapbooking are becoming more common as people increasingly turn to the internet for scrapbooking help. eBooks will give you a host of invaluable information and advice about scrapbooking and but most are not free. That's why I have put together this list to save you time and energy scouring the internet to find scrapbooking eBooks that are free. I have personally downloaded all of these scrapbooking eBooks and know that they are absolutely 100% FREE. Enjoy!

  1. A free eBook from Scrap Girls. 65 Pages full of information, ideas, and help for beginners to learn the basics of digital scrapbooking.

    This free scrapbooking eBook discusses technical aspects like backing up files, printer selection and the best software to use for digital scrapbooking layouts. Also contains links to digital scrapbooking templates and layouts. Comes in an easy to read downloadable PDF format. No sign up required. (Unfortunately no longer available)


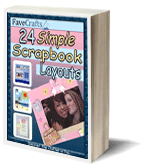
  2. 24 Simple Scrapbooking Layouts eBook
    This eBook from favecrafts.com contains the directions to make 24 different simple scrapbooking layouts. Ideas for family photos, wedding photos, summer events and more are contained in this 36-page free scrapbooking eBook.


  3. Starting Points - Creating Meaningful Scrapbook Layouts from Whatever Inspires You eBook
    Starting Points by Linda Harrison will help inspire your scrapbooking with 120 unique layouts which includes images of the original starting points that inspired each layout. Includes cute quotes from kids, receipts, vacation snapshots, patterned paper, party supplies, paint swatches, brochures and more which served as the inspiration. This free scrapbooking eBook contains lots of tips for brainstorming ideas to create unique layouts.


  4. 101 Scrapbooking Tips eBook
    101 Scrapbooking Tips is a 112 page PDF document that discusses basic scrapbooking. Probably only suitable for the absolute beginner with no scrapbooking knowledge at all.


If I have missed including your free scrapbooking eBook in this list please let me know and I will update this list. Have fun!


Friday, April 24, 2009

Simple Photo Matting for Scrapbookers

Most photographs can be enhanced by fixing them to coloured cardstock. This process, known as matting, is one of the most simple and effective ways to display your photographs.

Mounting a photograph on cardstock is easy. Begin by choosing a colour which complements or contrasts with the basic colours in the photo. A mat ought to add interest and definition. If you are unsure what colour to pick most photographs work well with strong plain backgrounds. Black can be particularly effective. Once you feel confident in your choice you might like to experiment more with patterns to produce original and eye-catching effects.

Simple Steps to Mat a Photo

  1. Apply tape, photo stickers or adhesive to the back of your photograph.

  2. Fix photo to your chosen cardstock by placing it on one corner. Line up the edges of the photo with the edges of the cardstock. Ensure that you leave a small border on the bottom and side of the photo.

  3. Once the photo is adhered to the cardstock use scissors to cut around the image. Make sure you leave enough of a border of backing card to work with.

  4. Finally trim remaining sides of cardstock to the same amount of border all the way around. A guillotine, if you have one, is very useful for this purpose.

  5. You are now ready to use your matted photo in your layout.

Friday, April 17, 2009

Handy Scrapbooking Tools for Beginners

Beyond the basic equipment for the beginner there are other handy items that can be added over time to you scrapbooking kit. Here is a list of some useful tools:

Rubber Stamps
There are a variety of rubber stamps on the market for scrapbooking and cardmaking. Stamps can be used to add decoration to the page and for titles and journalling. Inkpads come in different colours. Make sure you only buy inkpads that are acid free and contain permanent ink.

Craft Knife
Craft knifes can be a godsend for cutting out titles. Make sure you use a cutting mat at all times. If you choose a cutting mat with a grid you will find it makes cutting and measuring much easier.

Paper Trimmer
One of my favourite scrapbooking items is my paper trimmer. It cuts paper and card up to 12x12. I use the Kaiser brand which has a variety of interchangeable blades but there are many others on the market to choose from. The beauty of interchangeable blades is that I can easily get the kind of look I want such as scalloping with a flick of a switch.

Eyelet Tool
If you intend to add a lot of embellishments to your pages you might find an eyelet tool useful. You can buy a kit that includes a hole punch with a variety of different hole sizes.

Embellishments
Embellishments add interest and flair to your pages depending on your theme and the look you are hoping for. Try buttons, paper, fabric such as ribbons and twill tape, tags, wire and metal.

Sunday, April 12, 2009

Scrapbookers Guide to Cropping Photos

Not every photo that you will want to use in your scrapbooking pages will be perfect. Once processed you might be disappointed to find that your best pictures have distracting backgrounds or other features that detract from the overall quality or effect you are looking for. One very simple way to immediately improve your photos is to crop them.

Cropping is a very easy technique whereby unwanted details of the photo are eliminated leaving only the parts of the image that are desired. Professionals use heavy pieces of black card cut at right angles which are placed on the photograph to help them decide how much of the photograph to crop. Simply by moving the corners closer together different amounts of cropping of the image can be tested. Once the desired result is achieved the corner points are marked and joined on the image with a sharp pencil. Using the pencil lines as guides the image is then cropped with a paper trimmer or guillotine.

You can achieve great effects with cropping too by creating your own "croppers."

How to Make Your Own Pair of Croppers
Using stiff black cardstock and starting in the righthand corner cut out one right angle measuring 10cm x 2.5cm. Then repeat this process using the same dimensions as before but this time starting at the bottom lefthand corner. You will then have two right angles to use with your smaller photographs to help you with your cropping decisions. Croppers can be any size you wish. Another useful size for larger photographs is 15cm x 3cm.

Wednesday, February 25, 2009

Essential Supplies for Scrapbooking Beginners

Many people think that they need a lot of equipment to scrapbook but a beginner can get by with only a few essential items. Here's a list to get you on your way at very little expense.

Essential Supplies for Scrapbooking Beginners Most Useful Tools


Essential Supplies for Beginner Scrapbooking


Scissors

Ensure that whatever scissors you buy are sharp and easy to use.  I find a small sharp pair for cutting around lettering and small shapes useful.  Also it is handy to have a larger pair for general cutting.

Not essential but kind of useful is to have some fancy scissors with unique patterns to cut out edges and make decorative frames. These can be bought in pack containing various design patterns at very low cost.

Essential Supplies for Beginner Scrapbooking - Scissors with unique decorative patterns


Adhesive

Choose eiither double-sided tape or photo stickers.  Photo stickers are easy use and are suitable for photographs.  They come on a runner which makes them easy to handle. Glue dots can be useful for sticking down heavy card. What ever adhesive you choose make sure it is acid free and archive safe.

Pens

Acid free permanent scrapbooking pens are readily available and relatively cheap. A fine tip and a thicker tip for journalling and decorating pages will be enough to get you started. There a range of colours available but black is probably the most useful colour.

Trimmer or Guillotine

A guillotine is useful for trimming card and cropping photographs.  You will get much straighter edges than what can be achieved with scissors.

Card and Paper

Make sure that any card you buy is acid and lignin free to prevent deterioration of your precious photographs.  If you don't you will find your photographs turning yellow and fading as the chemicals in the card and paper eat away at them.

Albums

Albums are available in different sizes.  For a beginner the standard 12x12 album size is a good choice. Scrapbooking albums are acid free, photo-safe and are usually marked archival quality. They are a bit more expensive than other kinds of photo albums but it is worth paying a little more to get an album which will protect your photographs from premature aging. Don't try to economise on this.  It really is not worth it.

Related Links
Start a Scrapbook Tutorial for Beginners to Create First Page
Handy Scrapbooking Tools for Beginners


Monday, February 16, 2009

6 Main Elements of Scrapbooking Layouts for Beginners

In this Scrapbooking Tutorial for beginners we are going to look at the six main elements of a scrapbooking layout. You will learn about the importance of each element and how they create a cohesive whole when put together on a scrapbook page. As scrapbooking is all about perserving your precious memories knowing about elements and how to use them is important to the whole process of making a scrapbook.

What are the Elements of a Scrapbook?

A scrapbooking element is bascially any item that goes on a scrapbook layout. Elements fall into six main groups which include: photos, matting, titles, journaling, embellishments and borders. How these elements are arranged on the page creates different effects or moods and if done successfully, a pleasing effect.

If you were to do a Google search of scrapbook elements you would find that the term elements is being used more and more often to refer to embellishments which are either physical or digital. For the purposes of this discussion though we will stick with the traditional understanding of element which emcompasses all the main things you put on a scrapbook page.

So let's take a look at each of these main elements in turn and see how they contribute to building a scrapbook spread. For each element I will give you a few scrapbooking tips and pointers that hopefully will be useful to you.

1. Photo or Photos
Photos are the backbone of your layout and therefore one of the most important elements. A scrapbooking layout has at least one photo depicting an event or feeling. Most scrapbooking layouts have multiple photos of varying sizes but it is possible to have just one larger photograph that makes a statement and every other element on the page directs the eye to the photo.

Note: I would not recommend cropping heritage photos as they are too valuable but with everyday photos that can easily be replaced cropping is a way to instantly remove mistakes and make distant subjects pop.

Scrapbooking Tip:
Use only your best photos as poor (eg out of focus, badly framed, distracting backgrounds) detract from the overall effect. Far better to use fewer high quality photos than a bunch or mediocre ones. That being said though if they are the only photos you have to work with then cropping out some of the distracting elements or using a frame to cover these are both good ways to enhance images.

If you want to get more photos on a page which sometimes is the challenge then a collage of your best photos can be an effective way to add multiple images to a page without the photos dominating. If you have too many images they are likely to crowd other elements. Think balance and harmony. The object is to have all elements on the page sit together harmoniously.


2. Matting
Matting is a scrapbooking element that refers to a piece of cardstock used to accentuate a photo. The cardstock is placed underneath the photo to create an all-around border effect. This helps the photo stand out from other elements in the layout and therefore grab the viewer's attention.

Scrapbooking Tip:
Matting the focal point photo is a very effective technique to add interest to your page. Or you can choose to matt all the photos in the layout and either add a different color of matt to your focal point photo or double or triple matt it for emphasis. Plain or patterned paper can be used depending on the effect you want.


3. Page Title
Choose your title carefully. A good title sums up or highlights the theme of the page. It should be snappy and add punch to your page. Simple words, phrases, place names, names of people and sayings can all be used successfully as titles.

A title can be placed in many different positions on the page not just in the top position. The point of a title is to catch the attention of anyone looking at your page. A title is an important element as it helps to add balance to your page. Our eyes are used to scanning a page for the title so place your title in a position that will draw the viewer's eye to it.

Scrapbooking Tip:
Inspiration can come from all sorts of places like magazines and instagram. Titles can made out of just about anything. Beginner scrapbookers will find stickers, die cuts, stencils, cut outs and computer generated fonts are all good for titling. Consider using your own handwriting for a more personal touch.


4. Journaling
Journaling expands or explains the story depicted in your photos. It fills in the details for anyone looking at your pages. For this reason your journaling should cover the bases so that the viewer will be informed about what is occurring in the photos without having to ask the where, what, why, when, who and how types of questions.

Journaling can be set out in a variety of effective ways. The easiest method for the beginner is to write directly on the background paper. Other choices include writing in journaling boxes using cardstock and on patterned papers, vellum or other textured papers and using journaling cards as in the Project Life system. If you need to keep your journalling more private consider placing it in a pocket on the page.

Scrapbooking Tip:
Short descriptions, letters, captions, quotes, sayings, song lyrics, poems and verses are all possible journaling mediums.


5. Embellishments
Scrapbooking pages can be accented with a variety of embellishments often referred to as elements. These add interest and highlight the page visually. Types of suitable embellishments include stickers, buttons, ribbons, brads, eyelets, buckles, silk flowers, and slide mounts to name a few.

Photo corners can add another decorative element to your pages. When placed at each corner of the photo they help to draw the viewer's eye to the photo. Ribbons and brads can also be used to create a similar focal point.

Scrapbooking Tip:
Embellishments are most effective when kept to a minimum. Be careful not to overshadow your photos and journalling with too many embellishments which take the viewer's attention from the page. Pick up to five embellishments to put on one page. Odd numbers of element often add greater symmetry to a page.


6. Borders
Borders are elements that can be added to the sides, top and bottom of the layout to add visual interest. Decorative borders can be created out of many materials including cardstock, patterned paper, fabric, tags, charms, metal and many more. You can buy borders as stickers which is an inexpensive way to add a border element to your scrapbook layout.

Scrapbooking Tip:
A punch can be a versatile piece of scrapbooking equipment to help you achieve a lot of different effects with borders. Heart and star shapes are always useful if you decide to buy a punch to create interesting border effects.


Now that you have learned the main elements that make up a scrapbooking layout you are now ready to have some fun creating your scrapbooking pages.


In this scrapbooking tutorial I discussed the six main elements of scrapbooking and how these together combine to create a cohesive effect.


Related Articles

How to Scrapbook Childhood Memories in a Memory Keeping Album
Best Love Quotes for Scrapbooking Layouts
Best Scrapbooking Page Titles Ideas for Family Layouts
Memory Page Title for Scrapbooking Suggestion List